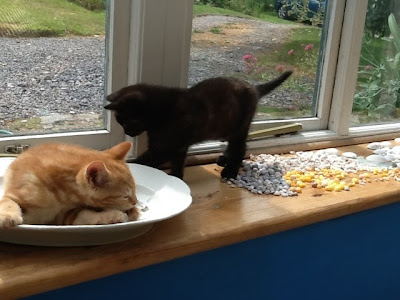
All our hard work wasted! At least the kittens looked happy.
Little M had to go home on Thursday evening, so it as a very short visit, but nice to see her all the same.
On Friday, J and I decided to do something with the shells and that is what I am going to share with you all now. We didn't actually use these shells, but delved into A's stash of shells from years past (which is pretty extensive) to make a birthday present for S at J's work. Shell craft is usually A's forte, so J and I felt a little nervous at the prospect of potentially wasting her shells but we forged ahead anyway. This is what I'm going to share with you now.
This general technique can be used for lots of things - we've mostly used it for mirrors or photo frames, and have two huge A-made mirrors the bathroom at 2CC - but this time we decided to do as a sort of plaque.
So, first, you gather together your supplies. You need the thing you will be decorating, enough shells to cover it, water, polyfilla (or similar), knives for spreading, cloths for wiping up smears and a mind ready for creating!
The wood we were using was quite rough, so J started by smoothing it out with a wire brush.
We were then ready to start!
It's a good idea to have a rough plan in your head of where you want the shells to be placed because, once you've started, you have to work quite quickly. The polyfilla we had sets in about an hour - and for the last 10 minutes or so is pretty stiff to work with, so the shells are less likely to stick. Also, working in a pair, its's a good idea to plan so that you don't have arguments in that crucial stage where everything must be done fast!
Here was our very rough plan - we just thought about where our biggest shells would be and agreed we would fill in the gaps however we felt like, keeping it generally symmetrical.
Now, mix up the polyfilla. The general ratio is 2 parts powder to 1 part water, but there's no need to measure it very accurately. Make sure you use something that doesn't mind getting a bit mucky, and be ready to clean it out before it sets too hard. The consistency you want is fairly thick, but not so thick as butter, and without lumps as much as possible.
Now you spread it over your surface and start positioning your shells - couldn't be more simple! We started with the basic design we had mapped earlier...
...and then start filling in the gaps, bit...
...by bit...
This is all a matter of preference - the important thing is to keep going before the polyfilla dries! It's good to have a balance of colours, shapes and sizes, and it looks best with the least amount of white showing between the shells as possible. This means searching for little shells, like tiny yellow periwinkles, little top shells and other elusive treasures like cowries and wentle traps.
When the polyfilla gets stiff - stop! There's no point really ramming the shells in because they're more than likely to not stick properly and you can always add shells later (as we did) using glue (A told us super glue would've been better but we went for good old PVA). Now, leave it to dry properly. (At this point we went off for a walk.)
We went back and did the bit around the top of the plaque separately afterwards, and then left this to dry as well.
The last step is giving the whole thing a good varnish - we just used standard clear drying furniture/household varnish. Don't skip this step - varnishing the shells really brings outs their sheen, as though they are still wet from being washed up on the beach.
And there you have it - how to make a shell picture in a few easy steps! It's not as good as A's creations but for me and J it seemed good enough, and we just hope that S likes it. (I'm sure A would've done a better tutorial as well.)
A wonderful way of creating memories and using up shells and other bits and pieces that you collect on holiday - A also uses driftwood and sea washed glass but we didn't have any this time.
Beautiful shells, beautiful sunshine, beautiful outdoors.
x


No comments:
Post a Comment